Strong Heel Socks | An Easy Pair of Crochet Slipper Socks

My Strong Heel Socks – a free pattern here on the blog – are a simple pair of slipper crochet socks perfect for first time sock stitchers!

Read through my inspiration, design process, and lots of info on crocheting the perfect pair of slippers, or scroll on down for the FREE PATTERN.

The Inspiration

That’s it. I’m calling it. We’re done.

We’ve done just about all we can. We’ve got three days until Christmas is here and, let’s be real, if we ain’t got it yet we ain’t gettin’ it.

Santa can just forget that last trip to the toy store. Tell him to swing by JOANN instead. We need some Lion Brand Yarn Touch of Alpaca. We’re about to get our slipper sock on.

Okay, all jokes aside. This time of year I always tend to lose myself a little bit. I get stressed and overwhelmed trying to stitch all the things and, in the end, I just feel burnt out.

How do I remedy that?

I stitch something for myself. Right now, I’m working up a pair of my Rudd Socks, a quick and simple to stitch single crochet slipper sock perfect for last minute gifting – to myself.

The Design Process

Most of my patterns are offered in many sizes to make them as inclusive as possible. Here’s the deal. Socks are incredibly personal. They don’t always fit, it can be super frustrating to get them just right, and sometimes we just need someone to tell us how to make a sock that fits us…every time.

Now, I know what you’re saying. “Rohn, but I want to make these for other people.”

I have plenty of patterns for that. This sock design is meant to take you through the process of making the sock, step by step, stitch by stitch.

Today, we’re going to stitch up these slipper socks in a luxurious yarn, Lion Brand Touch of Alpaca. That little touch is just SO fancy. LOL. I really love this yarn. The acrylic means it’ll be perfect for slippers because it’ll wear really well. The touch of alpaca is just so soft. This yarn is amazing and with all these amazing colors…you can’t go wrong.

Rudd Socks

SKILL LEVEL:

Advanced Beginner

MATERIALS:

FINISHED SIZE:

ANY! This slipper sock will fit YOU!

GAUGE:

16sts = 4 inches in Single Crochet worked in the round

ABBREVIATIONS:

NOTES:

This pattern will require a touch of work on the front end.

  1. Measure the circumference of your foot. This should be the circumference of the ball of your foot. Use a cloth tape measure and just wrap it around (not too tight!). This will be measurement A.
  2. Measure the length of your foot. This will be the length of your longest toe to the back of you heel when standing. Did you know your foot lengthens when you stand! That’s why it’s important. This will be measurement B.

THE MATH:

First we need to find the number of stitches we will increase to.

Measurement A x 4 stitches per inch = Total Number of Stitches.

You’ll round this number to the closest of the following numbers: (24, 30, 36, 42, 48)

SOCK

Ch 2, work 6 sc in 2nd ch from hook. PM in first sc to mark beg of round.

Round 1: 2sc in each sc around. (12 sc)

Round 2: Sc in each sc around.

Round 3: *2sc in first sc, sc in next sc; rep from * around. (18 sc)

Round 4: Sc in each sc around.

Round 5: *2sc in first sc, sc in next 2 sc; rep from * around. (24 sts)

Continue in this manner, increasing 6 sts every other round until you have the number you chose in THE MATH section above.

Next Round: Sc in each sc around.

Rep last round until sock measures 3 inches less that your Measurement B.

You’ll now begin working in rows.

Row 1: Sc in each of the next 12 (14, 18, 20, 24) sts. Leave the rest of the stitches unworked.

Row 2: Ch 1, turn, sc in each sc across.

Row 3: Ch 1, turn, sc2tog, sc in each sc across.

Rep Row 3 until 4 sts remain. You need to be ready to work a RS row. So, if you end ready to work a WS row, work 1 row of single crochets.

Next Row (RS): Sc in each of the next 4 sts, turn your sock 90 degrees, single crochet in each row end down heel, sc in each sc across instep (top of sock) and place a marker in the first and last stitch of this section, turn your sock 90 degrees, single crochet in each row end to end of row, join to first sc with sl st.

You’ll now begin working in rows.

Next Round: Ch 1, Sc in each sc around to 2 sts before the first marker, sc2tog, sc in each st to next marker, sc2tog, sc in each st to end of round, join to first sc with a sl st.

Rep last round until you have the 24 (30, 36, 42, 48) sts left.

LEG

Next Round: Ch 1, sc in each sc around, join to first sc with a sl st.

Rep last round for about 1 inch.

Finish off.

Final Thoughts

I really hope you enjoyed this pattern! I just love sharing all these free patterns with you all! If you stitch this up, make sure you take a photo and tag me in them on Instagram and show off your project in the Rohn Strong Maker Community on Facebook too!

Advertisement

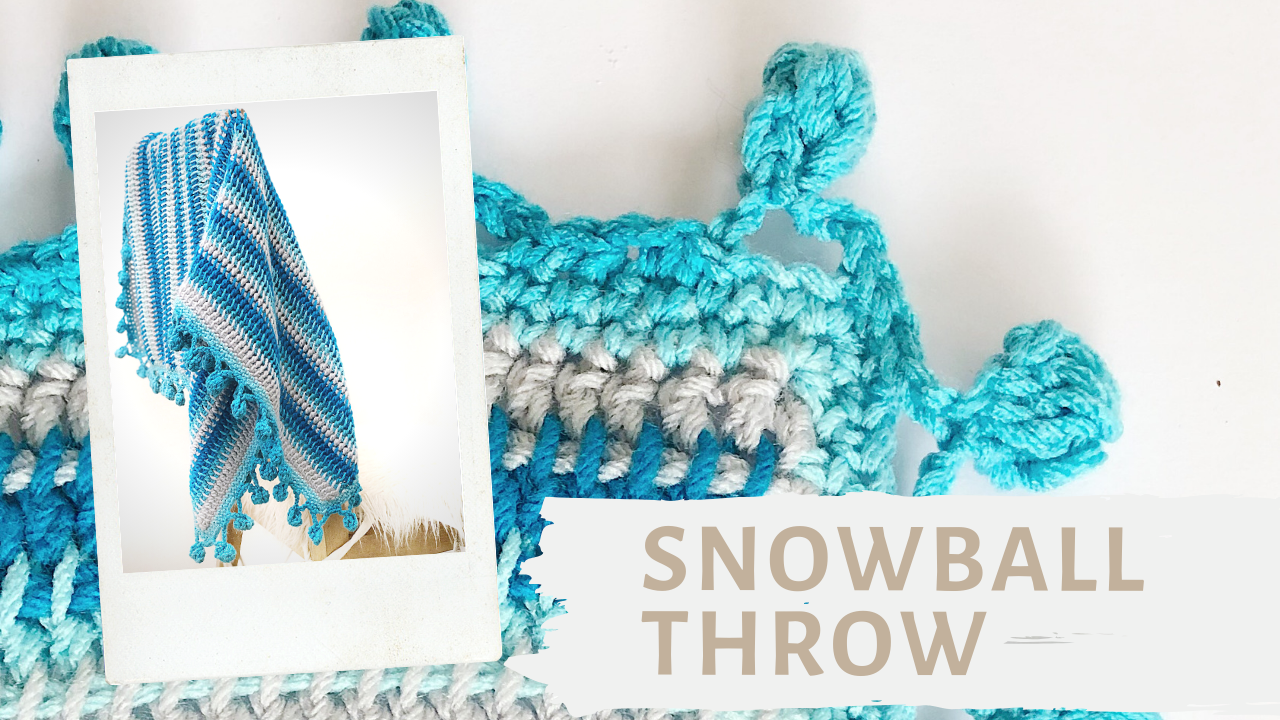
The Snowball Throw | An Easy Tunisian Double Crochet Throw with Pom Fringe

My Snowball Throw – a free pattern here on the blog – is a gorgeous holiday-inspired throw worked in my favorite stitch – Tunisian Double Crochet!

Read through my inspiration, design process, and lots of info on the perfect yarn I chose, or scroll on down for the free pattern.

You can purchase the PDF pattern which features 5 sizes from Baby to King HERE.

The Inspiration

The holidays are right around the corner and I’d be lying if I said I wasn’t already looking ahead toward decorating. This year, I’m going with a cozy minimalist theme but needed to add a bit of color. The color palette I chose featured a new color of Red Heart Super Saver but, more on that later.

The Design Process

Often, yarn choice influences my design process. Other times, I start with a clear idea and find just the right yarn. This design was definitely the latter.

I needed to pick a quick stitch because I just don’t have a lot of time to crochet lately but, I didn’t want to sacrifice warmth.

I chose tunisian crochet for two reasons:

  1. I could use a larger hook to speed up the crochet process without sacrificing any warmth.
  2. I could use a tunisian double crochet stitch which works up very fast and has wonderful drape.

Tunisian double crochet is similar to tunisian simple stitch. It’s worked almost exactly the same except, before inserting your hook from right to left into the next vertical bar, you place a yarn over on your hook. Then, when drawing the yarn through you complete the stitch exactly as you would a double crochet.

It’s quick, easy, and a lot of fun to stitch. The best part? This stitch doesn’t curl one bit. That means when you’re finished, you just need to weave in a few ends and you’re set to go!

The yarn came next. Red Heart Super Saver is my very favorite yarn to stitch afghans with. It’s hard wearing, colorfast, and made right here in the USA! How awesome is that?

It was also great timing because Red Heart Super Saver happened to release a few new colors. I ran to my local JOANN, grabbed a few skeins, and picked up this gorgeous array of colors! Look at that Pool color?! It’s just perfect.

I get asked all the time, Rohn…how do you choose your colors?!

Well, the truth is I don’t. I’m terrible at choosing colors. I need a guide that helps limit my scope. I love color. So much color. That’s a good thing – sometimes. Other times it can be overwhelming.

Here are a few tips:

  1. Pinterest is your friend. Find a color palette you love and stick to it.
  2. Stick with a limited palette. Too much color can be overwhelming.
  3. If choosing colors for someone else, make a mood board to see what they like!

Red Heart Super Saver comes in over a hundred colors and is just perfect for creating a custom palette perfect for gifting.

You can always follow me on Pinterest where I share my fave color palettes from time to time!

You can purchase the PDF pattern which features 5 sizes from Baby to King HERE.

Snowball Throw

SKILL LEVEL:

Advanced Beginner

MATERIALS:

FINISHED SIZE:

32 inches by 32 inches

GAUGE:

12 sts and 5 rows = 4 inches in Tunisian Double Crochet

ABBREVIATIONS:

Ch(s) – Chain(s)

YO – Yarn Over

St(s) – Stitch(es)

Tdc – Tunisian Double Crochet

Sl st – Slip Stitch

RetP – Return Pass

NOTES:

Tunisian Double Crochet (Tdc) – To work the forward pass in Tdc, beginning with the second vertical bar, yarn over, insert the hook form right to left under the front vertical bar and draw up a loop, yarn over, draw through 2 loops on hook, leaving 1 loop on the hook. Repeat this in each vertical bar across. On the very last vertical bar in the row, work under both the front and back vertical bars to create a firm edge.

Traditional Return Pass: Ch 1, *yo, pull through 2 loops; rep from * until 1 loop remains on hook.

Loop already on hook at beginning of the forward pass counts as first stitch.

THROW

With A, Ch 101

Foundation Row: *insert hook into back bump of next ch, yo, pull up a loop; rep from * across. RetP. (101 sts)

Row 1: With A, ch 1, *(yo, insert hook from left to right through next vertical bar, yo, pull up a loop, yo, pull through 2 loops on hook); rep from * across. With B, RetP. (101 sts)

Row 2: With B, Tdc in each st across. With C, RetP.

Row 3: With C, Tdc in each st across. With A, RetP.

Rep Rows 1-3 until blanket is 32″ long or desired length.

Last Row: *Insert hook from left to right through next vertical bar, yo, pull up a loop, pull first loop on hook through second loop; rep from * across.

Finish off.

Edging: With B, join yarn in any corner, ch 1, 3sc in corner, *sc in each st across to next corner, 3sc in corner; rep from * around, join with a sl st to first sc.

Work 1 further round of single crochet.

Snowball Border: Ch 1, sc in first sc, sc in each of the next 2 sts, *(ch 6, in third ch from hook work puff st, ch 3, work puff st in ch-1 top of previous puff st, fold pom in half, sl st in same ch as first puff st, ch 1), ch 3, sk 2 sc, sc in each of the next 3 sts; rep from * around, sl st to first st.

Finish off.

Note: You might not end up with evenly spaced poms. That’s normal. Every side of my blanket had a different number of poms. It’s more important to keep them as evenly spaced as possible and fudge as you go!

Final Thoughts

I’m in love with this afghan! It works up so fast, it’s incredibly easy, and you’ll be guaranteed big smiles from everyone you gift it too!

You can purchase the PDF pattern which features 5 sizes from Baby to King HERE.

I really hope you enjoyed this pattern! I just love sharing all these free patterns with you all! If you stitch this up, make sure you take a photo and tag me in them on Instagram and show off your project in the Rohn Strong Maker Community on Facebook too!