
A blanket perfect for that last minute gift – my 5 Hour Baby Blanket – is my newest free quilt pattern with JOANN.
Read through my inspiration, design process, and more below!
The Inspiration
In 2016, I became an uncle. It was one of the best moments of my life. Since then I’ve become an uncle twice over and my nieces give me such joy. I really am the Best Uncle Rohnny.
This blanket was inspired by my oldest niece, Addy. Her angelic smile and contagious laugh is all I need to make it through the day. She also happens to be obsessed with pink and princesses. So, her Uncle Rohnny decided to do what he does best and design a quilt perfect for his little girl!
I grabbed my notebook, sketched a few things out, and was off to the races!

The Design
This quilt is quick to stitch. I mean, it’s not called the 5-hour afghan for no reason. Here are a few tips and tricks to make it go even faster:
- Choose a charm pack for your center 25 squares. Don’t feel stuck with the two color pattern I chose. This could be worked up using a variety of prints, colors, and fabrics. Make it fun and make it you. Using a charm pack will save you on the extra cutting time.
- Cut all your pieces out first. Look, here’s the deal. Cutting is the most difficult part for beginner quilters. Iron and starch that fabric, cut it as needed, and keep it organized.
- If you have a few 2.5″ strips laying around, you could definitely use those to work the inner and outer border.

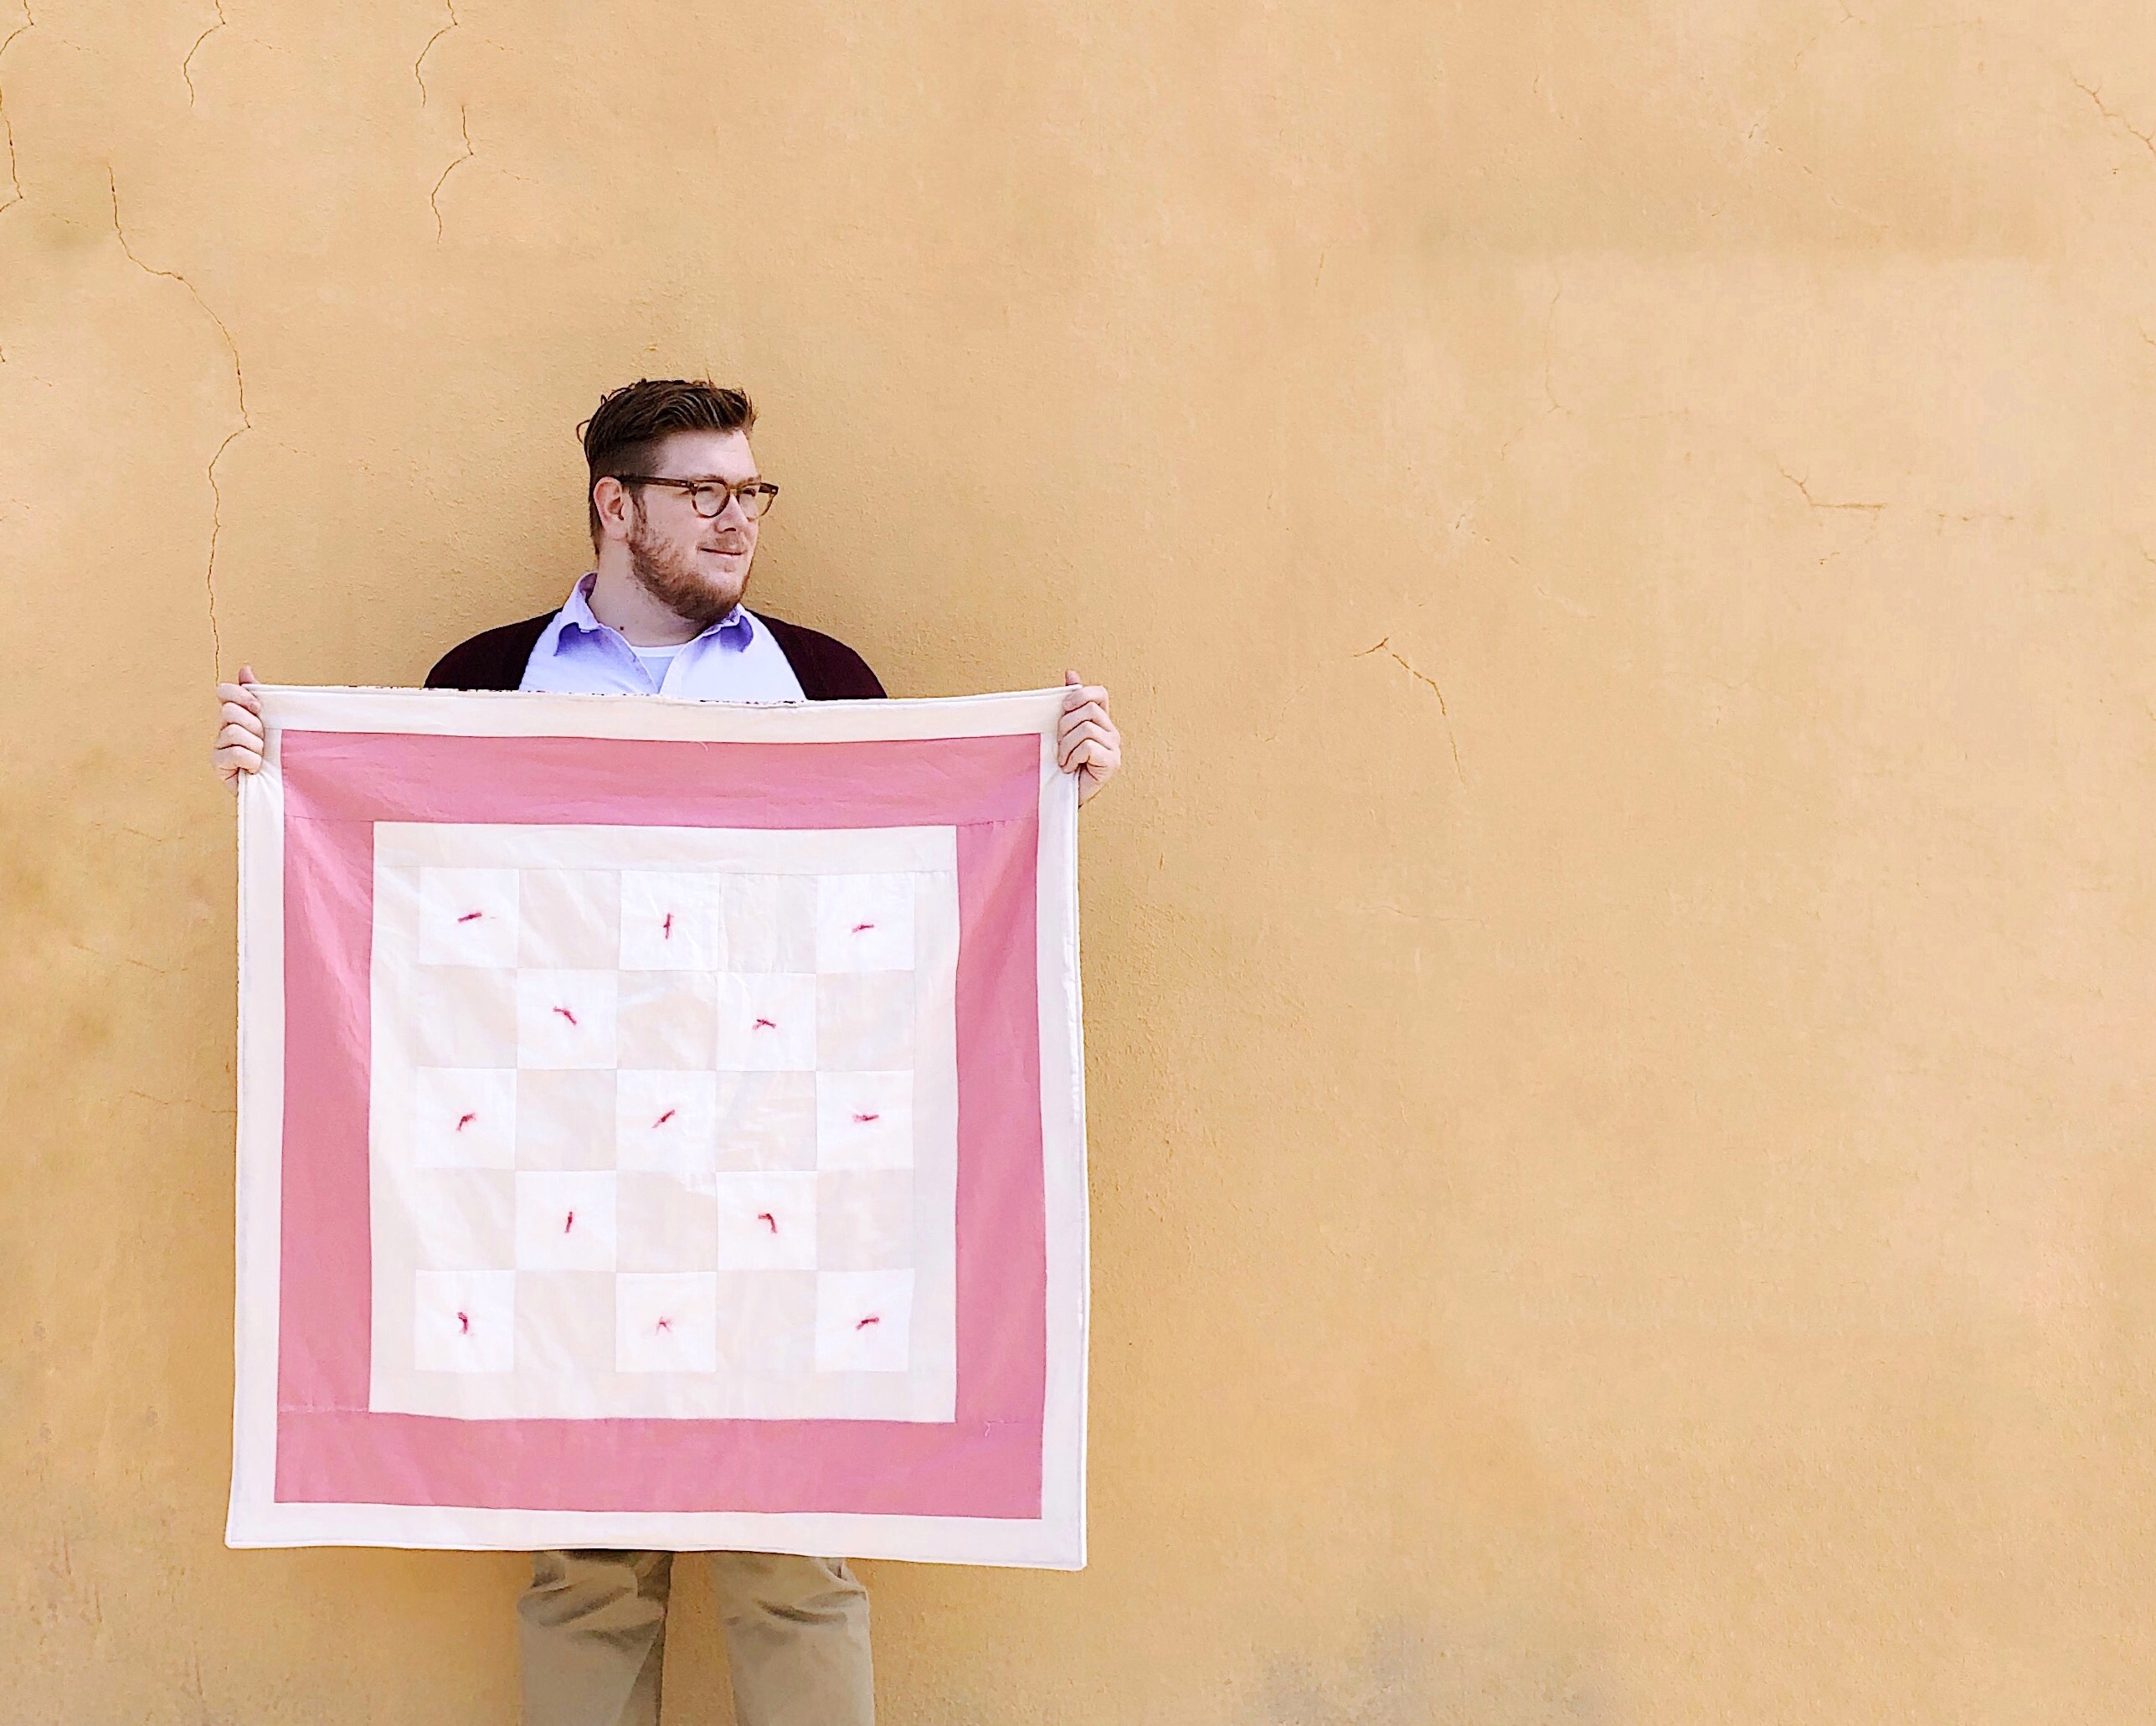
The Pattern
Finished Quilt Size:
40″ x 40″
Here are all the supplies you need, each available from your local JOANN.
- 25 – 5″ squares (12 White and 13 Beige)
- 1/2 yard each of Beige and Coral
- 1 yard floral print for backing
Sample quilt uses Kona Cotton in various colors.
Step 1 – Arrange and Sew
Referring to the photo of the finished quilt, lay out the 5″ squares in rows. If desired, you may arrange in any pattern that appeals to your eye.

When you are happy with the arrangement, sew the blocks into rows then sew the rows together to complete the center of the quilt.
Step 2 – First Border
Cut (3) 2.5″ stripes across the width of the fabric. Sew the strips together end-to-end to make one long strip. Trim the borders from this strip. The strips should measure approximately 23″ for the sides and approximately 27″ for the top and bottom. Sew first border strips to center.

Step 3 – Second Border
Cut (4) 4.5″ strips across the width of the fabric. Sew the strips together end-to-end to make one long strip. Trim the borders from this strip. The strips should measure approximately 27″ for the sides and approximately 35″ for the top and bottom. Sew second border strips to center.
Step 4 – Third Border
Work as for Step 2.
Step 5 – Bind
This quilt is completed using a no-fuss binding. Making a quilt sandwich layer as follows:
- Batting
- Backing with RS facing up
- Top with WS facing up
Sew around quilt leaving about an 8″ opening. Pull the RS through the hold and close by top stitching around the quilt. For a more in depth titorial please see the video linked here.
Step 6 – Quilt
The beauty of this quilt is in its simplicity. We don’t see that any clearer than in the quilting. Tie quilting is a simple method of using yarn or embroidery floss to tie the layers of the quilt together. It’s my favorite method and gives the finished quilt a vintage vibe!
First, gather your supplies. You’ll need a few 5″ strands of yarn. I used 13, choosing to place them only in the white squares. You’ll also need a sharp needle with a large enough eye to pull the yarn through.
Each tie is worked as follows:
- With needle threaded and the top of quilt facing up, insert the needle through all three layers and pull it back up about 1/4″ from the insertion point.

- Cut the thread so there are two tails, each about 2″ long.

- Tie a knot and pull it tight to the quilt.
- Trim the knots to about 1/2″.

Continue placing the ties in alternating squares or as desired.
